Author Archives: Lauren

About Lauren

Foodie, blogger, instructional technologist and the Evernote Ambassador for Home Cooking.

Homemade Hot Sauce

Relax, dear friends, and take a deep breath–maybe not too deep, you might inhale something.  But rejoice, because no, there will not be a Sriracha shortage after all.  Yay.

Now, I don’t currently make anything that rivals the marvel that is sriracha sauce, but it did get me thinking about how much I love hot sauce in general.  It’s a lot.  But the importance of a good sauce is not just the heat, it’s also about flavor.  And many hot sauces really just one or the other.

poblanohotsauce-6

Of all the things you know how to make in your home kitchen, hot sauce might not have been on the list.  It should be, though, because it’s one of the easiest things to do and then you can control both the heat and the flavor.

In my case, I like to use poblano peppers, because I love the way they taste, and serranos.  Sometimes I amp it up with habaneros or do a mix of serranos, jalapenos and other peppers.  The fun part is playing around.  Also, eating.  Definitely eating.

I’ve posted on this before, and you can find that post plus the original recipe here.

No, seriously, apple syrup is a thing

applesyrup-type
I first wrote about apple syrup a couple years ago.  I just wanted to remind you all that seriously, this stuff is legit.  You should make some while you can still find unpasteurized cider in the store.

I do love living in Michigan for a number of reasons, but the apple harvest is definitely in the top ten.  Josh purchased 15 gallons of freshly pressed cider to make hard cider.  I had him pick up a couple extra gallons for me to make syrup.  We got a cran-apple blend, and a semisweet blend.

The first syrup I’ve made this week used the cran-apple blend plus a couple of Tahitian vanilla beans and 40 minutes later, the result was a gorgeously amber-colored syrupy explosion of flavor.  We actually drank a little from a cocktail glass; it’s that fancy.

I think that next will be a cinnamon-heavy blend for my french toast (yum).  But seriously, go forth and make yourselves some yum.

Basic apple syrup recipe

Apple cake: apple pie for minimalists

Apple CakeI don’t know if you know this about me, but I suffer from a very intense case of laziness.  It’s something I’ve struggled with for a long time.  Well, I wouldn’t say struggled, exactly.  That indicates some sort of action on my part and I’m far too lazy for that.  What’s truly amusing about the whole thing is that I really am a very productive person, all told.  Or at least, I seem to manage to be.  I have a full time job, a couple of part time gigs, a fairly active social life, clean house and lots of hobbies.  So maybe it’s less that I’m lazy and more that my time is at a premium.

Yeah, that sounds way better doesn’t it?  I should have started out with that.

Apple Cake

What was my point?  I had a point.  Oh right–so my laziness, I mean, time premium has some negative aspects to it.  The biggest one being that sometimes I want food in my mouth but I don’t want to have to make the effort to produce said food.  Oh, how I long for the halcyon future-days of the Jetsons era where I can have a robot produce food for me, put it into my mouth and help me chew.  Sure, I could crack open a box of Kraft mac or some pizza rolls–and don’t get me wrong, I will occasionally do that (anyone who tells you they never do probably has a pantry full of lies)–but generally I want real food.  Real good food.

This brings me to pie.  Pie is difficult thing.  It’s not actually that hard to make, but it takes some time.  You have to make the dough and then chill it and then there’s all that rolling and–yawn–at this point, you haven’t even put together the filling yet.  OMG.  First world kitchen problems.

Apple Cake

However, this apple cake saves the day.  All you have to do is dice some apples (with the skin on!), mix them with a super easy batter, pile them into a pan and bake.  Done.  And what you get is a delicious dessert that’s like pie, but faster and lighter.  And if you’re not a fan of pie crust, well you’re probably a vampire but you’re also going to love this dish.  And if you are a fan of pie crust, you’re still going to love this dish.  

Apple cake: apple pie for minimalists

Adapted from Strawberry Plum

Ingredients

  • 4 large or 8 small-medium honeycrisp or similar apples
  • 3/4 c. flour
  • 3/4 tsp baking powder
  • 1/8 tsp salt
  • 1 tsp cinnamon
  • 1/2 tsp grated nutmeg
  • 2 eggs
  • 3/4 cup sugar
  • 2 tbsp amaretto
  • 2 tbsp frangelico
  • 1 cup melted unsalted butter

Instructions

  1. Preheat the oven to 350F. Grease a 8 or 9 inch pie pan.
  2. Dice the apples into half inch chunks.
  3. In the bowl of your mixer, combine all the other ingredients--first the dry and then the wet. Fold in the apples.
  4. Pour the batter into the prepared pan and bake for about 1 hour (start checking it at 50 minutes, depending on your oven).
  5. Let cool, run a knife around the edge to loosen it and then slice and serve as you like.
http://haveforkwilleat.com/2013/11/apple-cake-apple-pie-for-minimalists/

IMG_5470

Have an Even Better Grocery Trip

I’m always on the lookout for anything that will make grocery shopping easier.  One of those things is making a more efficient list.  There are tons of grocery list apps out there with a lot of bells and whistles, but frankly, I don’t need all that.  I don’t really do the couponing thing, and I don’t need to make a list for every store I visit…sometimes I just want the easiest, fastest way to make a list so I can get to the store and get on with the cookin’.

So that leads me to Grocerytrip, the easiest grocery list app there is.  Its creator Matt is a stay at home dad who made the app to make his life easier, which is something we can all get behind.  Grocerylist is targeted at Evernote users and its beauty is that you never actually have to make a list–you just have to tag the recipes in Evernote that you intend to use with the “grocerytrip” tag and the app does the rest for you.

It detects the ingredients in the recipe and automatically compiles a list–and even separates the items by type.  Beautifully, if two or more recipes call for the same ingredient, it just adds the necessary amounts together.  You can also see which recipe the ingredient is for, so you always know what you need and what you’re making.  When you get to the store, you just open Grocerytrip and there’s your list.


I love this.  As you know, all my recipes are in Evernote anyway.  All my meal planning goes through Evernote.  It’s so easy to just figure out which meals I want to make, tag them and go on my merry way.  And if I want to be super fancy and organized, I:

– Go through my weekly grocery ads and find which items are on sale.  Go through my Evernote recipe notebook, or use Supercook, to pick recipes that use those ingredients.

-Tag those recipes with the “grocerytrip” tag.

-Filter notes by that tag.  Select those notes and  create a “table of contents” note and organize the dishes by day.  Ta da!  Menu and grocery list in one.

Grocerytrip is only available for iOS (sorry Android fans).  It won best app in the Food & Cooking category in the 2013 Evernote Devcup.  You can read more about it here or check it out in the App store.  It’s $2.99 but if you’re an Evernote fan, it’s totally worth it.


10 Ways Evernote Improved My Life

There’s an event coming up next week that’s really a pretty big deal.  It’s the Evernote Trunk Conference 2013 and I am super excited to be going.  There will be amazing talks, great tips to learn from all the awesome users who show up to meet and share with others, and of course, the fabulous rockstars behind the software.  I’m also super geeked to see some of the other Evernote Ambassadors, who are the icing on my green elephant-y cake.

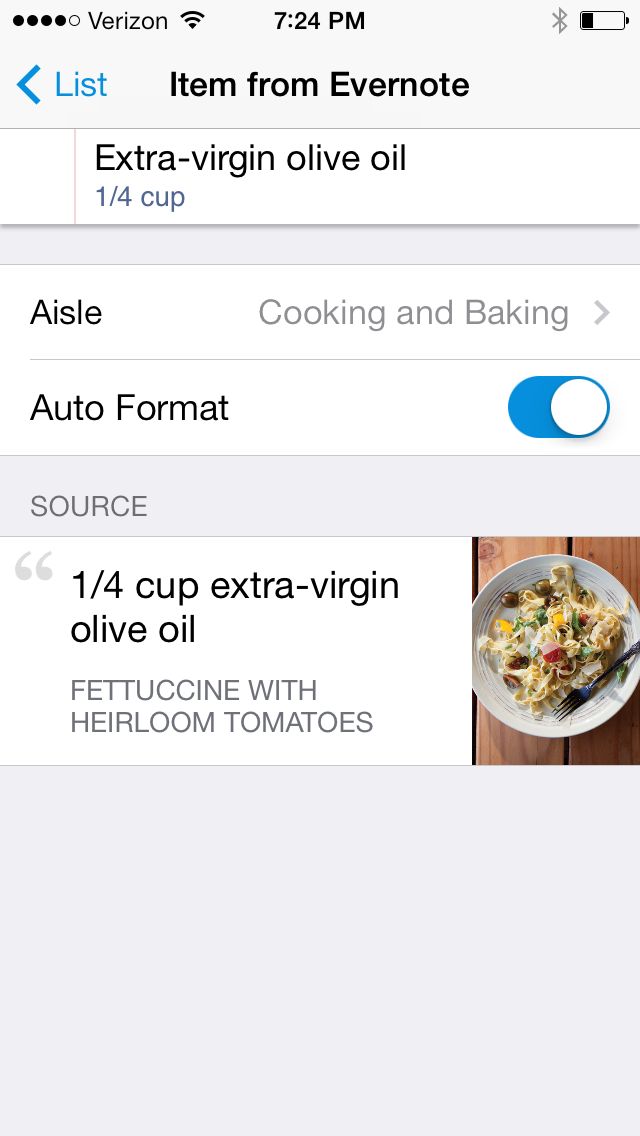
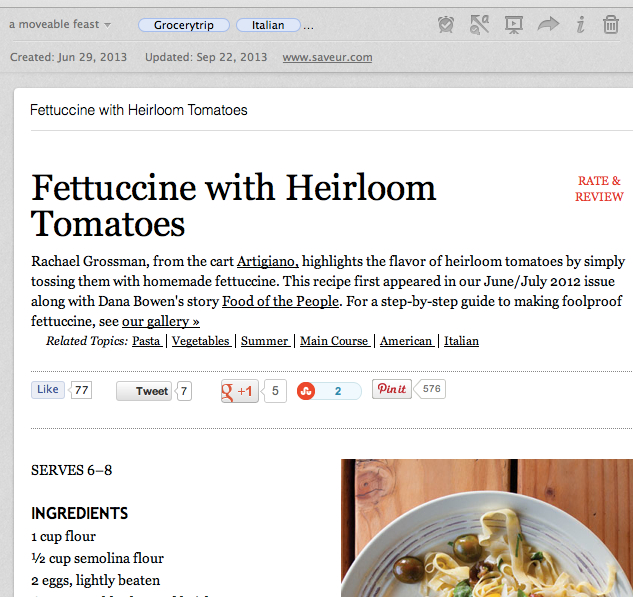
I’ve mentioned Evernote a fair bit here before—it is the digital engine that fuels my kitchen organization and…well, the rest of my life.  I’ve talked about 15 ways to get recipes (or anything) into Evernote, how to use it to digitally search your physical cookbooks, and why you should be using the companion app, Evernote Food.  But now, with Evernote Trunk just a few days away, I’m gonna take a cue from the fabulous Jenni Lathrop and Daniel Hendrick, among others, and list 10 ways that Evernote made my life better.


10 Ways Evernote Has Improved My Life

1. All of my recipes and cooking notes are in one location, instead of five different websites, three binders, a bunch of loose cards and a stack of a couple dozen old magazines I think I’ll look through again but really won’t.

2. If important mail comes in, I can scan it and toss it.  No more piles of things cluttering up my kitchen counters and table.

3. Shared notebooks make it easier to collaborate with other people, both personally and professionally.  My office uses Evernote Business, so we can easily access shared meeting notes and project information.  My husband and I have a shared notebook with things like scanned bills, info from our dogs’ vets, travel notes, and general household information.

4. With premium, I can toss in files and they’re searchable.  I don’t have to spend a lot of time opening one file after another to figure out if it’s the one I need.

5. Livescribe.  I can take real notes!  On real paper!  With a real pen!  And still have it all saved digitally into Evernote.

6. I use Skitch to take screenshots for documentation and help guides in my regular job, and all of those get saved to Evernote, so I can easily access them over and over again.

7. Evernote Food means I can not only plan where I want to eat when I travel places, but I can take pictures of my dining experiences there and keep track of not just what I ate but where.

8. Re-organizing is really easy.  My productivity style changes on a regular basis; I’m always looking for newer, better ways to organize my life.  If I need to change my system in Evernote, doing so is really, really easy thanks to bulk editing.

9. When I redid my pantry, I took an image note of the space and then marked it up in Skitch.  I kept a list of all the items I wanted to build or buy in Evernote, along with links and prices.  I did the same thing for my garden beds, and I’ll be doing it for every room renovation I eventually do, too.

10. Evernote’s user community is amazingly dedicated and awesome.  Every time I talk to someone, whether a beginner or another Ambassador, I learn great new ideas.  They are the best help guide ever made.


And that last reason is what makes me the most excited for the conference–I can’t wait to meet up with people and learn some great new tips and tricks, and share my own.  If you’re coming to this year’s conference, come find me!


Check out my Evernote Recipe Notebook

Get Started with Evernote

My Getting Organized with Evernote workshop notebook

Fettuccini with Roasted Red Corn

Roasted Red Corn Linguine, and Some Things I’ve Never Tried

I found red sweet corn at Whole Foods last week.  Not Indian corn.  Not the band Korn painted all up in red.  Red sweet corn.  I’d never even seen it in a store before, let alone tried it.  So I bought some, because what do you do when confronted with something new and mysterious?  You eat it.  It works for babies, it works for puppies, it can work for you, too.

redcornwoil

I’ve also never tried putting corn in pasta before.  I’ve seen it, and I’ve avoided it for a long time.  I shy against putting two carbs together in the same dish, I don’t know why.  It’s like carbs all the way down, and it makes me feel guilty.  But despite that, I decided to make linguine and add the sweet corn in to it.

It was delicious.

redcorn

Of course it was.  I wouldn’t take the time to write up a recipe that was gross or disgusting, not to mention all the photos.  What kind of bored monster do you think I am?

Anyway, other things I’ve never tried:

-Eating an entire plate of Cap’n Crunch french toast from the Bomber (it exists and it is delicious but I fear it would kill me)

-Eating green eggs with a fox.  Eating green eggs in a box.  Eating green eggs here or there, eating green eggs anywhere.

-Strawberries that taste like pineapples.

-Making tiny ice cream sandwiches out of those little cookies they give you on Delta flights.

-Rambutans.

-Making my own puff pastry because I don’t hate my free time that much.

-Chocolate covered grasshoppers.

redcornpasta-mixing

Now, I’m not saying that all of those things would be as delicious as this roasted red corn pasta…except for the french toast.  That would probably do it.  But I’m a little more inclined now to try…everything except the grasshoppers.  Maybe the grasshoppers.  Probably not the grasshoppers.

redcornpasta

Roasted Red Corn Linguine, and Other Things I’ve Never Tried

Ingredients

    For the Corn:
  • 2 ears fresh red sweet corn
  • 1/2-3/4 cup olive oil
  • 1 cup fresh basil
  • 3 whole peeled garlic cloves
  • 1/4 tsp black pepper
  • 1/2 tsp sea salt
  • For the Chicken
  • 1 pound boneless, skinless chicken breasts
  • 1/4 cup olive oil
  • 1 cup cherry tomatoes
  • 1/4 tsp black pepper
  • 1/2 tsp sea salt
  • For everything else
  • 1 pound fresh linguine noodles, cooked according to package directions
  • 1/2 cup fresh basil, chopped
  • 1 cup sliced red onion
  • 2 cups green beans, cut in half
  • 1 tbsp butter
  • pecorino romano, grated--however much you want

Instructions

  1. Preheat the oven to 400F. Line two small baking pans with tin foil.
  2. Prepare the corn: place the oil, basil, garlic, pepper and salt in a blender and puree. Brush a few tablespoons of the oil mixture all over the sweet corn. Place the corn in one of the prepared pans.
  3. Prepare the chicken: in the other tinfoiled pan, place the boneless, skinless chicken breasts and the cherry tomatoes. Drizzle the olive oil over both and sprinkle them with the salt and pepper.
  4. Place both pans in the oven and roast for 30 minutes, or until the corn is browned and soft and the chicken is cooked through. Let cool slightly. Slice the chicken into strips. Hold each corn cob up on its end and carefully cut the corn kernels off the cobs.
  5. In a large bowl, toss the cooked linguine noodles, fresh basil, red onion, green beans, butter, chicken and corn kernels with the rest of the oil/garlic/basil mixture (from step 2). Sprinkle the pasta with the grated pecorino.
  6. Enjoy!
http://haveforkwilleat.com/2013/09/roasted-red-corn-linguine-and-some-things-ive-never-tried/

Supercook__recipe_search_by_ingredients_you_have_at_home

Optimize Your Pantry: Using Supercook to Create a Menu

Supercook is an awesome little site.  If you’ve never tried it, what it does is help you find recipes using ingredients you specifically have on hand.  It’s great for a “Cook Your Cupboard” type thing, if you have ingredients sitting around that you’re not familiar with and don’t know how to use, or if you’re just looking for something new to try.  It can also help you save money by creating menus around sale items at your local grocery store.

Take your current grocery store sales circular.  For instance, I like to shop at Hiller’s, which is a local, southeast Michigan grocery chain.  I go through the circular and find main staple items that are on sale.  This week, I can see they have steak, greek yogurt, strawberries, chicken breast, portobello mushrooms, radishes, salmon, tortillas, cheese, sour cream, eggs, canned tuna and watermelon on sale.   I like most of those things; I almost never cook with radishes, though, so that kind of appeals to me as something new to try.  My goal here is to focus on these items, since they’re on sale, supplement them with a few things I always keep on hand (like rice and herbs/spices), and develop a dinner menu for the week that will give us healthy meals but also allow me to experiment a bit.Supercook__recipe_search_by_ingredients_you_have_at_home_and_Evernote So here I’d open Evernote and create a note with the list of items that are on sale and how much they cost.  If you prefer pen and paper, break out your trusty Livescribe pen or Evernote Moleskin notebook…or a sticky note or the back of a napkin, whatever works.

Now, go to supercook.com.  There’s an area called “My Kitchen” on the front page which lets you plug in specific ingredients, or you can choose them from a tag cloud in the center of the page.

I put in all the sale item ingredients and as I do that, it starts offering recipe suggestions that use at least one of those ingredients (and it tells you at a glance what other main ingredients you’ll need).  I can narrow down the results by category–for instance, dinner, salad, dessert, veggie, etc.  I can specify if I have a particular diet (i.e., gluten free, no dairy, etc).  I can also emphasize that I really want to use certain ingredients.

Supercook__recipe_search_by_ingredients_you_have_at_home-2 3

In this case, I put in the foods mentioned above and sorted through the results.   I made a weekday menu consisting of the following meals:

  • Yogurt marinated grilled chicken with braised radishes
  • Brazilian style skirtsteak with watermelon-lime salad
  • Bloody Mary salmon with salt-baked potatoes
  • Yogurt chicken curry with rice
  • Salmon salad wraps with marinated portobello

So once I’ve got some dish options that I think will work, I list the week’s dinner menu in that same Evernote note where my initial grocery list was.  So now I have a grocery list of sale items, plus the dish I’m going to make with it and the day I’m going to make it.  And I can also do this for breakfast, lunch and dessert.

Supercook__recipe_search_by_ingredients_you_have_at_home-2

Supercook__recipe_search_by_ingredients_you_have_at_home_and_Camera_Uploads-2

Of course, the service isn’t perfect.  The interface isn’t the most gorgeous thing ever, it won’t have every single ingredient you can think to put in, and not every suggestion has pictures or is going to be something you really want to eat.  But it’s a great start for figuring out a menu cheaply and trying some new things.

Anyway, give it a shot–it might just help you organize your shopping, utilize your pantry more effectively and still experiment with delicious new dishes.

Supercook


Plum Cocktail

This Week’s Cocktail: Plum Delicious

I know who did it.  I know who did it.  It was Professor Plum, with the dagger, in the kitchen.

Right?

Fresh PlumsI always did love Clue.  Also, cheesy food puns (ha! “cheesy!”).  And this cocktail gave opportunities for both of those.  Also, for a delicious libation using some of summer’s most beautiful fruits.  I’ll let you decide which plums you want to use—red, black, yellow, whatever.  Combine them here with sugar, limes, gin and we’re going to replace the sparkling water in this recipe with your favorite sparkling wine.

Now, the original recipe from the amazing Miss Martha herself makes 10 drinks.  Now, maybe you’re having a lot of company.  That’s great.  But if it’s just you, 10 servings might be a tad overdoing it.  So feel free to cut it down a bit.  Essentially, you’re going to use the sugar plus 1.5 cups of water to make a simple syrup, adding in the plums near the end for flavor.  You can stick with that part.  Then just follow step 2 in the instructions for each individual cocktail you want to make.

Update: I have to say, I actually really enjoyed this cocktail.  It was very sweet, so if sweet’s not your thing, you may want to skip it.  But it was delicious and lovely to look at in the giant round globe glasses I used.  Also…super boozy!

Enjoy!

Martha’s Plum Cocktail Recipe

 Plum Cocktail

Upside Down Blueberry Ginger Buttermilk Cake

Upside Down Blueberry-Ginger Buttermilk Cake

When your toast falls upside down and the delicious, melty butter side gets all icky, you feel sad.  When you flip over a USB thumb drive three times to get it into the port but fail because somehow it’s always upside down, you feel stupid.  But when someone purposely bakes a cake upside down, somehow the world seems right side up.  It’s a miracle of nature, those upside down cakes.

Upside Down Blueberry Ginger Buttermilk Cake

And while the golden standard (because it’s yellow!) will always be the classic pineapple upside down cake, peaches, apples and nectarines are also delicious.  But it’s August in Michigan (and I guess everywhere else too) so if you’re going to focus on a fruit, it had better be the noble blueberry.

Fresh Blueberries

So having a pint of blueberries left in the fridge, I figured I’d give upside down blueberry cakes a try.  It was a gamble that paid off.  A slight gamble.  Like one of the “freebies” that gets you hooked on the game, but then you have to pay next time.  I threw in some ginger because, well, I have a root of ginger and it wasn’t going to eat itself.  It’s also one of those flavors that pairs really well with lots of fruit so it seemed like a good choice.  I often just sort of go with things and see what happens.  You can’t be too conservative in the kitchen; you’ll never learn or have fun or accidentally melt a countertop (bad) or create the first chocolate chip cookie (good).


Upside Down Blueberry Ginger Buttermilk CakeI can tell you from experience, though—parmesan herb sweet marshmallows are not a bet that will pay off.  No siree.

This cake though?  Yeah you’re good.  Plus look how pretty it is!

 Upside Down Blueberry Ginger Buttermilk Cake

Upside Down Blueberry-Ginger Buttermilk Cake

Ingredients

    For the topping:
  • 1 pint of fresh blueberries
  • 1/2 stick butter
  • 1/2 cup brown sugar
  • 1 tbsp fresh grated ginger
  • pinch of nutmeg
  • For the cake:
  • 2 cups all-purpose flour, sifted
  • 1 1/4 cup sugar
  • 1 tablespoon baking powder
  • 1 teaspoon salt
  • 1/2 cup butter, softened
  • 1 cup buttermilk
  • 2 eggs, beaten
  • 1 teaspoon vanilla extract

Instructions

  1. Preheat the oven to 350F.
  2. In a mixing bowl, combine the flour, sugar, baking powder and salt. Add in the butter, milk, vanilla, eggs, ginger and cinnamon. Mix until it just comes together.
  3. Melt down half a stick of butter and half a cup of brown sugar in a small saucepan. Add in a tablespoon of fresh grated ginger and a pinch of nutmeg. Cook for a minute until the sugar is thoroughly dissolved and then pour the mixture into the bottom of a springform pan. Top with the pint of blueberries in an even layer.
  4. Pour the cake batter into the springform pan on top of the blueberries.
  5. Bake the cake in the oven for about 55-60 minutes or until a toothpick inserted comes out clean. Let cool completely.
  6. Open the springform pan and remove the sides. Carefully flip the cake over onto a plate and remove the bottom of the springform pan. If any berries came undone, just fudge them back into place a bit. Ta da!
http://haveforkwilleat.com/2013/08/upside-down-blueberry-ginger-buttermilk-cake/


Cornbread_in_cast_iron_pan

Marc’s Corner: Cooking with Cast Iron

I noticed that cast iron cookware seem to be making a bit of a comeback lately. And that is not a bad thing at all. My salute to the Food Network and a plethora of cooking shows out there for re-popularising cookware that has been with us for hundreds of years.

I am going to spare everyone an otherwise boring lesson on the history of cast iron cookware and get right down to the crux of it in this short article. You can find plenty of historical references on the interwebs. Continue reading

Feel Like Holiday Cocktail

Feel Like Holiday

Summer is almost over.  Seriously.  August is half gone.  School starts in two weeks.  Labor Day is right around the corner.  It’s madness, I tell you!  I haven’t been to a single beach, taken a single trip for fun, or wasted $500,000 on movie tickets on terrible action films…yet.  This is a dark time, indeed.

So in honor of the last days of my favorite season, and the fact that I totally could use a vacay, this week’s Champagne Wednesday cocktail will be the Feel Like Holiday.

Does it bug anyone else that the name isn’t grammatically correct?  Cause it bugs me.  But it does sound delicious.

Feel Like Holiday Cocktail

Feel Like Holiday
from DrinkMixer.com

1/3oz  vodka
1/3 oz grenadine syrup
3 1/3 oz Champagne

Cool the vodka and grenadine over ice.  Strain it into a champagne flut and fill with champagne.

Makes 1 cocktail.

Apps You Need: 10 of the Best iPhone Apps to Help With Recipe Substitutions

This list comes from Martina Keyhell at becomeananny.com and while I don’t post most of the solicitations that come my way, I did think this list had some merit…and I know recipe substitutions are necessary things to have on hand!  I have often either run out of an ingredient, or didn’t want to use it because of allergies or just general dislike.  Knowing what you can substitute and when can really come in handy, especially for those of you with food allergies or cooking for someone who has allergies.

Check out the full list of recipe substitution apps here.

Olive Oil Poached Tomato Sauce

Olive Oil Poached Tomato Sauce and Zucchini Pizza

I spent two days this weekend digging and playing around in a bed of chocolate.  Chocolate mulch, actually.  I was gardening.  It still smelled delightful.  It somewhat mitigated the hot, hard work of digging and planting.  Of course, afterwards, my sore muscles really wanted a nice hot bath.  So much so that as I was making dinner, I was a little jealous of the tomatoes in this sauce.

Olive Oil Poached Tomato Sauce

I mean, look at those little red balls of tastiness bobbing in a warm, simmering olive oil bath.  That’s the life right there, surrounded by fragrant, relaxing herbs.  Isn’t that just the life?

So this sauce is delicious and it only takes 20 minutes to pull together.  It could work on pasta, pizza, poured over grilled meats and veggies or just dip your bread in it.

I used it to make zucchini pizza.  Take a few zucchini, cut them in half lengthwise and scoop out some of the flesh.  Then pile on some toppings–I do cheese, a couple layers of pepperoni, the sauce and more cheese.  Then put them on a cookie sheet and bake them for 350F for 30 minutes.  Voilà.  Crust-free, zucchini pizza with delicious homemade sauce.

Zucchini Pizza

Olive Oil Poached Tomato Sauce and Zucchini Pizza

Yield: About 2 cups

Ingredients

  • 2 pints cherry tomatoes
  • 2 cloves garlic
  • 1 cup fresh basil leaves
  • 1/2 cup fresh parsley
  • 1/4 cup fresh thyme sprigs
  • 1/2 cup fresh oregano sprigs
  • 1/4 tsp pepper
  • 1/2 tsp sea salt
  • 1 tsp brown sugar
  • 3/4 tsp red pepper flake
  • 1/2 cup olive oil

Instructions

  1. Put everything into a saucepan. Bring the olive oil to a simmer and let it cook at that level for 20 minutes.
  2. Pour the mixture into a blender, pulling out any herb stems. For a chunky sauce, pulse a few times until the large pieces are broken up. For a smoother sauce, puree completely.
  3. Pour over...anything.
http://haveforkwilleat.com/2013/08/olive-oil-poached-tomato-sauce-and-zucchini-pizza/

Semifreddo Bellini

Semifreddo Bellini

I didn’t post a recipe for last week’s Champagne Wednesday because I was in Boston for a conference at the time.  I did get to celebrate Champagne Wednesday at L’Espalier, an awesome modernist restaurant in the Back Bay area, where we were staying.  They had a French Kiss cocktail on the menu and it just happened to be Wednesday, so I assumed it was fate.  Delicious, delicious fate.

Semifreddo Bellini

I almost decided on a green tea champagne cocktail for this week but that meant buying and preparing matcha tea in advance and…well, I got lazy.  So we’ll save that one for next week.  This week, we’re going to hold on to summer as much as we can (omg it’s August already) and celebrate with a popsicle in a glass: a semifreddo bellini.

Semifreddo means “half cold” in Italian.  It’s also the name given to a delicious, easy dessert and thanks to Martha Stewart, a sweet slushy version of the traditional bellini cocktail.  Her recipe blends frozen peaches, peach schnapps, champagne, superfine sugar and ice together, making a total of two cocktails.  Or one big cocktail if you’ve had that kind of day.  Hey, there’s no judgment here.  You do what you got to.

Semifreddo Bellini

Anyway, I can tell you the changes I’m probably going to make for this recipe myself: I think I’ll swap out the schnapps for cointreau, because I don’t have schnapps and I don’t want to buy schnapps but I do have cointreau and I think the orange-peach combination will be nice.  I’m also probably going to add in the leaves from a sprig or two of thyme, because my herbs are going insane.  Most likely I’ll muddle the time in with the sugar first before adding it all to the blender.  Hey, Champagne Wednesday is all about making a cocktail your own.  And then drinking it.  Because the best way to claim something is to eat it.

Get Martha Stewart’s Semifreddo Bellini recipe.

Semifreddo Bellini

Lauren's Semifreddo Bellini

Ingredients

  • 1 cup frozen peaches
  • 1 tablespoon fresh thyme leaves
  • 1 tablespoon sugar
  • 1 cup ice cubes
  • 1/4 cup Cointreau
  • 3/4 cup plus 2 tablespoons sparkling wine

Instructions

  1. Put the peaches, thyme, sugar, ice cubes, cointreau and the two tablespoons of sparkling wine into a blender and puree until smooth.
  2. Divide into two glasses and top each with half of the remaining champagne. Enjoy!
http://haveforkwilleat.com/2013/08/this-weeks-cocktail-semifreddo-bellini/

Basil Ravioli with Green Pea Sauce and Ham

Simple Basil Wonton Ravioli

Got to visit Boston for the first time this past week.  I was there for a conference and didn’t get to see a lot of the city, but I did walk a fair bit around the Back Bay area where the conference was.  It was beautiful and I can’t wait to go back.  I also got to have my first modernist, molecular gastronoy-esque meal at L’Espalier.  The dinner was incredible–you can check out my pics here.  And it was definitely an experience.

However, after a whole week of eating out, I was really ready to come home and cook something.  I also wanted something really simple.  It’s just me this weekend–Josh is in Vegas for his own conference (I know, right?)–so I figured I’d make myself something low-key.

Basil Ravioli with Green Pea Sauce and Ham

Normally, making ravioli is a little bit of a production, but for general ease, I like to use wonton wrappers.  They don’t produce exactly the same texture, but they’re good and fun nonetheless–plus, one less series of steps to take.  Here, I just wanted to showcase the basil fresh out of my garden with a little bit of creamy cheese and some olive oil.  I also wanted to use up the rest of the frozen peas sitting in my freezer, so I made another batch of delicious green pea-mint sauce.  That plus some diced, crispy ham made for a light, lovely repast.

basil ravioli

Simple Basil Wonton Ravioli Non-Recipe

Yield: 6 ravioli

Serving Size: 1

Ingredients

  • 6 wonton raviolis
  • 6 teaspoons mascarpone cheese
  • 6 small basil leaves
  • salt & pepper
  • grated parmesan cheese for sprinkling
  • 2 tbsp olive oil in a small bowl
  • 2 tbsp water in small bowl
  • 2 oz ham, chopped
  • 1 tbsp canola oil
  • 1 tbsp butter

Instructions

  1. Prepare a pot of gently simmering water.
  2. Lay out a wonton wrapper. Brush it with some of the olive oil. Place about a teaspoon of mascarpone cheese in the center and top it with a small basil leaf. Sprinkle on a little bit of salt and pepper and grated parmesan.
  3. Dip your brush into the water and brush around the edges of the wrapper. Then fold the bottom corner up to the opposite corner, creating a triangle, carefully smoothing the edges of the wrapper together into a tight seal.
  4. Repeat for each additional wonton wrapper.
  5. Gently lower the ravioli into the pot of simmering (not boiling!) water and cook for about 2-3 minutes. Remove and let dry on a paper towel.
  6. Heat up the canola oil and butter in a medium-sized frying pan. Add in the diced ham and fry until crispy, then add in the ravioli and (gently again) fry until crisp and browned on each side.
  7. Serve the ham and wonton ravioli with a healthy drizzle of green pea-mint sauce, or even just a bit of olive oil or browned butter.
http://haveforkwilleat.com/2013/08/simple-basil-wonton-ravioli/

Chicken with Mint Sauce and Rosemary Potatoes

Green Pea Mint Sauce for Two

We have a new fence!  It’s very exciting.  It looks beautiful and it’s intact.  It’s also four feet tall at the shortest level, so Maggie (our Mastiff) has to stand up on her hind legs in order to peer over it, which she can’t do for very long.  She ends up looking like a prairie dog, searching the horizon for predators, before popping her head back into the confines of the yard.  It’s hilarious.

it also has nothing to do with green pea mint sauce.  Well, at best, they are only tangentially related.  But this sauce is as delicious and easy as Maggie is hilarious.  It’s a particularly great recipe if you’re just cooking for yourself or for  the two of you.  It’s quick, has few ingredients and requires little effort, but it can jazz up some leftover chicken breasts or a rotisserie bird with a great, fresh burst of flavor.

Chicken with Mint-Pea Sauce

It was actually my dinner tonight, along with a side of rosemary potatoes (see below) and this week’s Champagne Wednesday watermelon cocktail.  And it was delicious.  Cooking for one often ends up being quick and simple but that doesn’t mean you can’t treat yo’self.  And sure, the heavy cream in this recipe might negate some of the healthier aspects of the peas but the verdent green color will at least make you feel really good :).

Rosemary Potatoes


Green Pea Mint Sauce

Yield: 2 servings

Ingredients

  • 1 tablespoon olive oil
  • 1 cup frozen peas
  • 3-4 fresh mint leaves
  • 1/4 cup heavy cream
  • 1 oz herbed goat cheese
  • salt and pepper to taste

Instructions

  1. Heat a small saucepan on the stove over medium heat. Add the butter and the peas and cook, stirring occasionally, until the peas are thawed and heated through.
  2. Add half the peas to the blender, along with the mint and and heavy cream. Purée until smooth. If you need a slightly thinner consistency, add some chicken or veggie stock, one teaspoon at a time until the desired results are achieved.
  3. Add the pea puree back into the sauce pan, along with the herbed goat cheese. Cook until the goat cheese has melted into the peas, stirring occasionally.
  4. Taste and add salt and pepper as needed. Serve over...well, anything, but I found grilled chicken to be particularly good.
http://haveforkwilleat.com/2013/07/green-pea-mint-sauce/

Here’s  a “no recipe” recipe for rosemary potatoes: quarter some new potatoes.  Put them in a saucepan and cover them with at least a spare inch of water.  Boil until fork-tender.  Drain the water and add in a tablespoon of butter and a teaspoon of olive oil, as well as some chopped rosemary and a sprinkling of sea salt and cracked pepper.  Cook over medium high heat until browned and crispy, stirring occasionally.


Watermelon Champagne Cocktail

Watermelon Champagne Cocktail

You remember how Champagne Wednesday works: each week, we try a different champagne cocktail to liven up the most boring day of the week.  I post the recipe we’re going to try at the beginning of the week, you make it (or your version of it) Wednesday (or as soon as you’re able) and then we all live happily ever after.  Oh, and I’ll update the version I use by Thursday afternoon.

This week, we’re going to take one of my favorite things and pair it with another of my favorite things: watermelon and booze.  We’ll use this recipe from Fabulous Fête, which includes some gorgeous pictures, if I do say so myself.  All you need are : fresh watermelon, fresh mint, lemonade and your favorite champagne or sparkling wine.

Watermelon Champagne Cocktail recipe from Fabulous Fête

I made this tonight and it was pretty fabulous, although I did my own twist on the recipe.  It’d be a great brunch drink too, I think, if you start to tire of mimosas.

Watermelon Champagne Cocktail

Yield: 2 cocktails

Ingredients

  • 2 cups fresh, chopped watermelon
  • 1/4 cup lime juice
  • 2-4 large mint leaves
  • 1 187-ml bottle of sparkling wine
  • ice
  • sugar for the rim

Instructions

  1. Put the watermelon, lime juice and mint in a blender and blend until smooth.
  2. Put a few tablespoons of sugar on a plate. Wet the rim of two wine glasses with water and then press the rims down into the sugar until it sticks. Carefully add a few cubes of ice to the glass.
  3. Fill each glass halfway with the watermelon puree. Then fill the rest with sparkling wine.
  4. Enjoy!
http://haveforkwilleat.com/2013/07/this-weeks-cocktail-watermelon-champagne-cocktail/

ChefSteps_-_Learn_how_to_be_a_better_cook.-3

Learn the Science of Cooking: ChefSteps

There are a lot of resources on the web for those of us who want to learn more about cooking without ponying up the time, cash and commitment it would take to go through a culinary program.  Maybe you just want to learn a couple of dishes, maybe you want to learn a particular skill, or maybe you’re really interested in the science behind how cooking processes work.  For those of you interested in the latter two, you might want to check out this site: ChefSteps.

ChefSteps is a FREE(!) site out of Pike Place Market in Seattle that has courses and mini-tutorials on why things work and how things work, as well as how to do something and some basic recipes.  You can get instruction on certain aspects of molecular gastronomy like how to centrifuge strawberry juice or the science of spherification.  It’s may not be something you’ll want to do as a beginner, but it’s definitely great knowledge to have stored away, and you can learn a lot of fun, advanced things to do in the kitchen.  I have no connection to this site at all, but I’ve been trying it out and it’s pretty fun.

Particularly awesome:

- They have a course on the Science of Poutine.  Seriously.
– They have text and image tutorials showing you how to do each step of a process.
– You can filter videos by recipe, technique or science, as well as beginner, intermediate or advanced.

Again, I wouldn’t really consider these “beginner courses.”  If you have never so much as boiled water, you might want to start with learning basic processes, patterns and ingredients for cooking, but once you’ve gotten all that down and you want a real challenge, this is an awesome resource.  Also free!

Check Out ChefsSteps